
Have you ever stared at a wildlife photo and felt like you were making eye contact with the animal? There’s something almost magical about that kind of image. It’s not just a snapshot it’s a window into another world, an invitation to connect with a creature on its own terms. That’s what wildlife animal portraits are all about. Instead of focusing on action or dramatic landscapes, these portraits aim to capture personality, emotion, and the unique quirks that make each animal special. Honestly, it can be tough there’s skill, patience, and respect involved but wow, is it rewarding when you get it right. Ready to dive in?
Why Bother With Animal Portraits in Wildlife Photography?
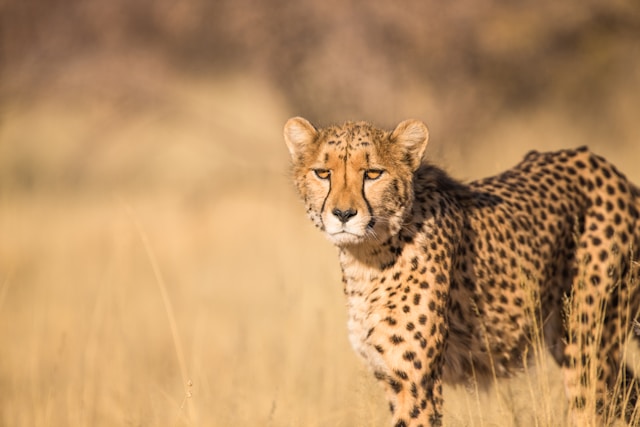
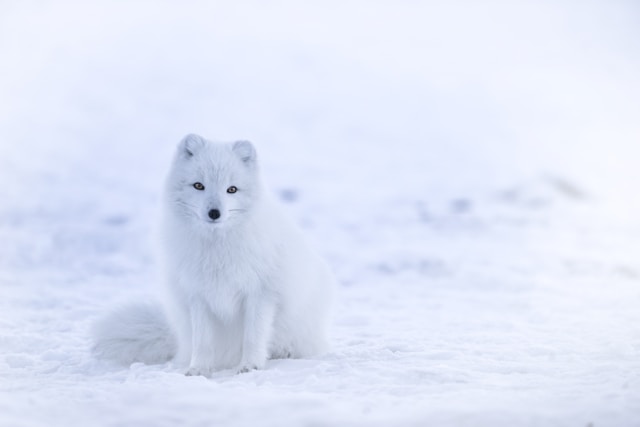
You might be wondering: why focus on portraits when there’s so much happening in the wild? For me, it comes down to connection. A really good animal portrait isn’t just “another deer” or “some fox.” It’s that deer, that fox captured in a way that makes you feel something for them as individuals.
These kinds of close-ups are powerful storytellers. Is your subject curious? Wary? Sleepy? Focused? One well-timed photo can tell you all that and more without a single word. You’ll notice little details too: the texture of fur, the glint in an eye, those one-of-a-kind markings. Learning to read animal behavior is super important here; sometimes anticipating a quick glance or a big yawn is what takes your shot from decent to unforgettable. Plus, these images often help people appreciate wildlife more deeply and care about conservation.
Gear You’ll Want for Wildlife Animal Portraits
Getting up-close-and-personal shots means having some specialized gear though don’t worry, you don’t need to buy everything at once! Here’s what usually helps:
- Camera Body: A DSLR or mirrorless camera with fast autofocus and solid low-light performance is great. If your camera has Animal Eye AF (many newer ones do), you’re in for a treat.
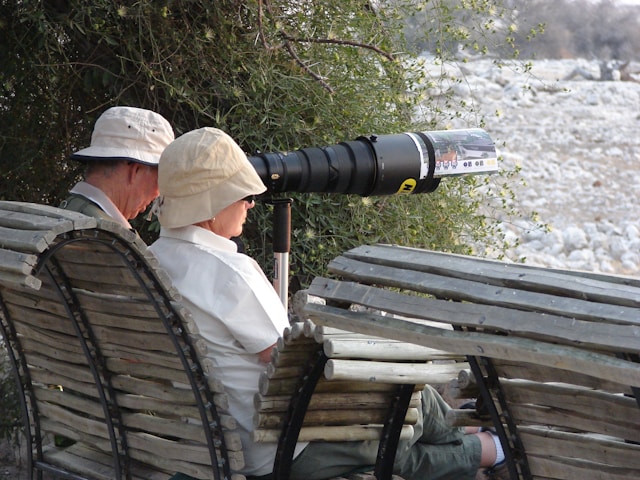
- Lenses: This is where most folks invest the most.
- Telephoto Lenses: Think 300mm and up (400mm, 500mm, 600mm even 800mm if you’re feeling fancy). Primes are sharp and bright but heavy on the wallet; telephoto zooms (like 100-400mm or 200-600mm) are versatile and still fantastic.
- Teleconverters: These little gadgets give your lens extra reach (like 1.4x or 2x), but keep in mind they can soften your image slightly and let in less light.
- Support System: Big lenses = heavy arms!
- Tripod: For stability especially during long waits or lower light times a sturdy tripod with a gimbal head makes life easier.
- Monopod: Handy if you need support but also want to move around quickly.
- Other Essentials:
- Extra batteries (trust me cold weather zaps them fast)
- Big, fast memory cards for burst shooting
- Beanbag (great for resting your lens on car doors or rocks)
- Remote shutter release for max sharpness
- Rain covers (weather changes fast outdoors!)
Start simple if you have to you can always build up your kit over time.
Camera Settings: Getting Those Wow Shots
Having good gear is awesome… but knowing how to use it? That’s where the magic happens. Here are some settings tips that really make portraits pop:
- Aperture: To blur out busy backgrounds and make your subject stand out, use a wide aperture (f/2.8–f/5.6). Longer lenses help too even at f/5.6, backgrounds melt away!
- Shutter Speed: Animals move even when they look still! Try starting at 1/focal length (so for a 500mm lens: 1/500s), but honestly, faster is better for birds or twitchy mammals (think 1/1000s+).
- ISO: Keep it low when possible (ISO 100–400) for clean images but bump it up if needed to keep your shutter speed fast enough in low light.
- Focusing: The eyes have it!
- Use Continuous AF mode so your camera keeps tracking movement.
- Single-point focus lets you target the eye precisely; Group AF/Zone AF helps with skittish animals. And if Animal Eye AF is available use it!
- Metering: Evaluative/matrix metering works most of the time. But if lighting gets tricky (say, dark animal against bright sky), try spot or center-weighted metering.
Honestly? Don’t be afraid to experiment until things start clicking for you.
Techniques That Take Your Portraits Up a Notch
Gear and settings aside it’s technique that really sets great portraits apart:
- Get Eye Level: Photos taken from an animal’s eye level feel way more personal than shots from above. Sometimes this means getting down in the dirt or shooting from a vehicle window!
- Focus on Eyes: This one’s huge the eyes should always be tack-sharp. If depth of field is thin and only one eye will be sharp, make sure it’s the one closest to your camera.
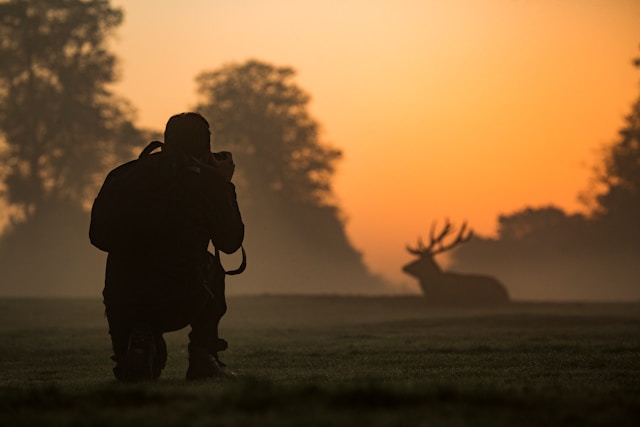
- Master Natural Light:
- Shoot during golden hour (early morning/late afternoon) for soft, warm light.
- Avoid harsh midday sun if possible; find shade or wait for clouds if not.
- Play around with light direction front lighting gives clarity, side lighting adds drama, backlighting creates beautiful rim glows.
- Compose Creatively:
- Use the rule of thirds not every subject needs to be dead center.
- Embrace negative space; sometimes emptiness makes your subject pop.
- Look for leading lines in nature branches or paths pointing towards your subject.
- Fill the frame when appropriate tight shots on faces can be super powerful!
- Capture Personality: Be patient! Wait for those telling moments a stretch, yawn, playful interaction that reveal who that animal really is.
Ethics Matter: Keeping Wildlife Safe
This part cannot be stressed enough: no photo is worth causing distress or harm.
- Always put animal welfare first; if an animal acts anxious because of you (stops eating, starts pacing), back off immediately.
- Long lenses are your best friends they let you get close without actually getting close.
- Study up on species before going out so you know their warning signs and stress behaviors.
- Move slowly and quietly; blend into natural cover whenever possible or just stay put and let animals come closer on their own terms.
- Never bait or feed wild animals it messes with their habits and can even endanger their lives (and yours).
- Know local rules about distance limits and protected species and respect private land.
Respect goes hand-in-hand with great photography out there.
Step-by-Step Guide: Nailing Close-Up Animal Portraits
Let’s pull it all together real quick:
- Research your chosen species their hangouts and habits.
- Scout locations ahead of time so you know where the best light/backgrounds are.
- Prep gear: charge batteries, format cards, clean lenses and preset basic camera settings based on conditions expected.
- Approach quietly or settle somewhere comfy and just wait patiently!
- Get low if possible; compose thoughtfully; place focus squarely on the nearest eye using continuous AF modes.
- Use burst mode sparingly to catch subtle expressions without filling up your card in seconds!
- Don’t obsessively check every shot while shooting (“chimping”) save reviews for later so you don’t miss key moments.
This workflow ups your odds of coming home with something truly special!
Editing Tips: Keeping It Real
Editing should enhance not fake the scene:
- Use tools like Lightroom or Photoshop (or similar alternatives).
- Start basic: adjust exposure/highlights/shadows/white balance first.
- Boost vibrance gently rather than saturation; subtlety wins here!
- Sharpen selectively around eyes/fur not everywhere to avoid crunchy backgrounds.
- Apply noise reduction carefully if high ISO was necessary; don’t overdo it though!
- Crop only as needed and try not to lose too much resolution by cropping excessively after shooting.
Remember: keep edits honest so viewers experience reality not fantasy.
Mistakes? We All Make ’Em…
Some common hiccups and how to fix them:
- Busy backgrounds distracting from your subject? Use wider apertures or change angles until things look cleaner behind them.
- Soft eyes ruining otherwise perfect shots? Double-check focus modes/settings and practice steady technique/support gear like tripods!
- Motion blur gotcha down? Faster shutter speeds save the day here or use support systems more consistently.
- Harsh midday sunlight causing ugly shadows/highlights? Golden hours are best or seek open shade/cloud cover as backup plans!
- Accidentally stressing out wildlife? Step back ASAP better safe than sorry every time!
- Over-editing making things look weird/unrealistic? Take breaks while editing and always compare back to originals before calling something “done.”
We’ve all been there the trick is learning as we go.
Wrapping Up: Your Own Portrait Adventure Starts Here
Learning wildlife animal portraiture isn’t just about technical skill it combines artful vision with deep respect for nature itself. There’ll be lots of waiting around…plenty of trial-and-error…and probably more than one muddy knee along the way! But trust me the moment you capture that spark in an animal’s eye? Pure magic.

So grab whatever camera gear you have handy even if it isn’t top-of-the-line yet and get outside! Be patient with yourself…and even more patient with wildlife…and share what moves you most with others along the way.
Who knows which wild face will inspire your next portrait adventure?